The other day I was desperate for something new for the twins to wear to church. I wanted something that looked like fall. I went through my stash and found the perfect pair of Maternity pants...and this tutorial was born!
Three Reasons to Love This Tutorial:
1. You have a pair of Maternity pants that you swear if you have to wear one more time you will (fill in the blank), BUT they are in good condition. NOW you have an excuse to cut them up!
2. This is SO stinkin' fast and easy it may make you cry (tears of joy of course).
3. The finished product on your favorite little girl may also make you cry (tears of pride and joy of course).
Let's get started shall we?!
Supplies:
Aforementioned Maternity Pants (size depends on size of your child. I used a pair of size 12 for two 2T skirts)
Sewing machine
Thread to Match
Pins
Step 1: Lay your pants out and find the widest part of the leg (these pants are size 12...and no I never wore them...hence the tag. My sister gave them to me after her husband gave them to her when she was NOT pregnant...OOPS! She was a good sport about it. Too short for me but I've always loved the fabric).

Now you should have two pieces of fabric that look a lot like skirts (or one if that's all you choose to do).

Now go to the top of your pants and cut out the waist leaving about two inches of fabric on the bottom like so (these pants happened to be flat in the front with elastic on the back...yours may be different): 

If your pants have an elastic on the back or all around, make sure to stitch it in place so that when you cut into it, you will not lose your elastic:
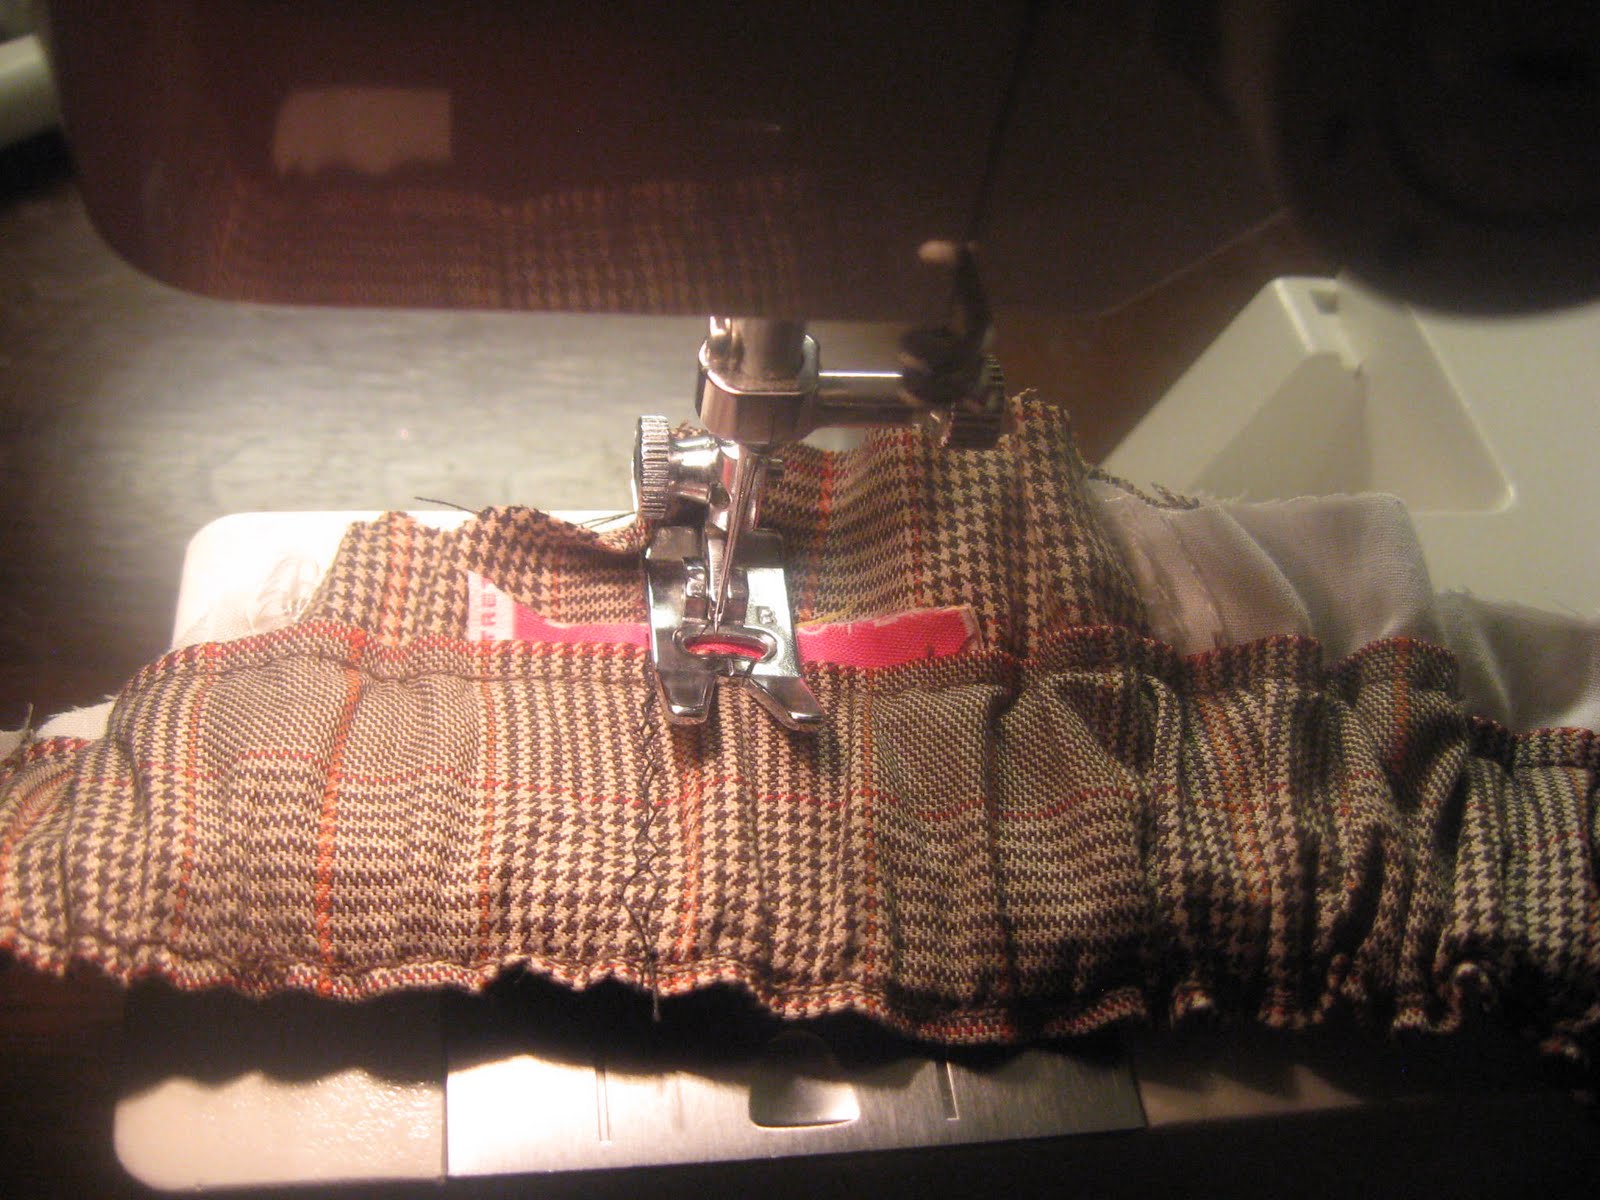
So as this sideways picture shows (darn blogger) you will need to do two seams so you can just cut right down the middle and you won't lose your gather or your elastic:

OK so now you have two skirts with two tops to sew on:

Decide where you want your front, back and sides to be and pin RIGHT SIDES together at the top of your skirt pieces (again sorry about the sideways picture):

It may be a little bit tricky with your elastic part just stretch and pin and remember that when you sew you will need to be stretching your elastic so it will all fit nicely:

Now first sew your front and back top part together at the side. Next sew all the way around getting as close as you can to the base of the original seam: 

If you have a serger or over-lock machine, go around again and finish everything off:

Hem the bottom of your skirts and YOU ARE DONE! Here's a view of the front and back:

I got a little excited and did a quick little matching onesie with some of the extra material and some buttons I had lying around. You can also see the crocheted flower clippie. I'll be posting about these little jewels soon! 

One of our beautiful little models showing us the front:

and the back:

Here's a view of the shirt front:

This is the first of three tutorials based on re-purposing Maternity Pants...so stay tuned! There will be some exciting Tutes ahead!